Item Receipt
Items > Item Receipt
Item Receipts are done to record items received from vendors or other warehouse. Item receipts are created automatically when Item Fulfillments are posted or when Ordering Guides are created and approved (if approval is required via the building or item).
Item Receipt Screen

-
Search - search by item receipt identifier
-
Open - filter by status
-
Reset - click to reset search parameters
-
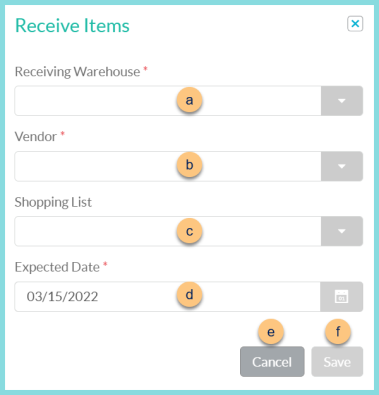
Receive Items - click to add a vendor receipt manually, which should only be done if an order or ordering guide was not created using TITAN. Note: Receipts from internal warehouses must have a Fulfillment created first and cannot be created manually.
-
Receiving Warehouse - choose the warehouse that is receiving the product. Note: If the user's security role is limited to one building, that building will be selected automatically.
-
Vendor - select the vendor that is delivering the product
-
Shopping List - choose a Shopping List to pre-populate the receipt with the items on the list
-
Expected Date - choose the date of delivery
-
Cancel - click to return to the previous screen without saving changes
-
Save - click to be redirected to the individual receipt screen
-
Advanced - click to open additional filter options
-
Fulfillment Vendor - filter by vendor
-
Fulfillment Warehouse - filter by fulfillment warehouse
-
Fulfillment Date - filter by fulfillment date
-
Receiving Warehouse - filter by receiving warehouse
-
Received Date - filter by received date
-
Expected Date - filter by expected date
-
Items - filter by item
-
Search - click to apply advanced filters
-
Identifier - click to sort by Receipt Identifier
-
Expected Date - click to sort by expected date
-
Warehouse - click to sort by receiving warehouse
-
Vendor Or Fulfillment Warehouse - click to sort by vendor or fulfillment warehouse
Order Total (not pictured) - click to sort by the total receipt cost -
Status - click to sort by receipt status
-
Pencil - click to be redirected to the individual receipt screen
-
Calendar - hover to see receipt activity
-
< > - click to scroll through pages
Individual Item Receipt
-
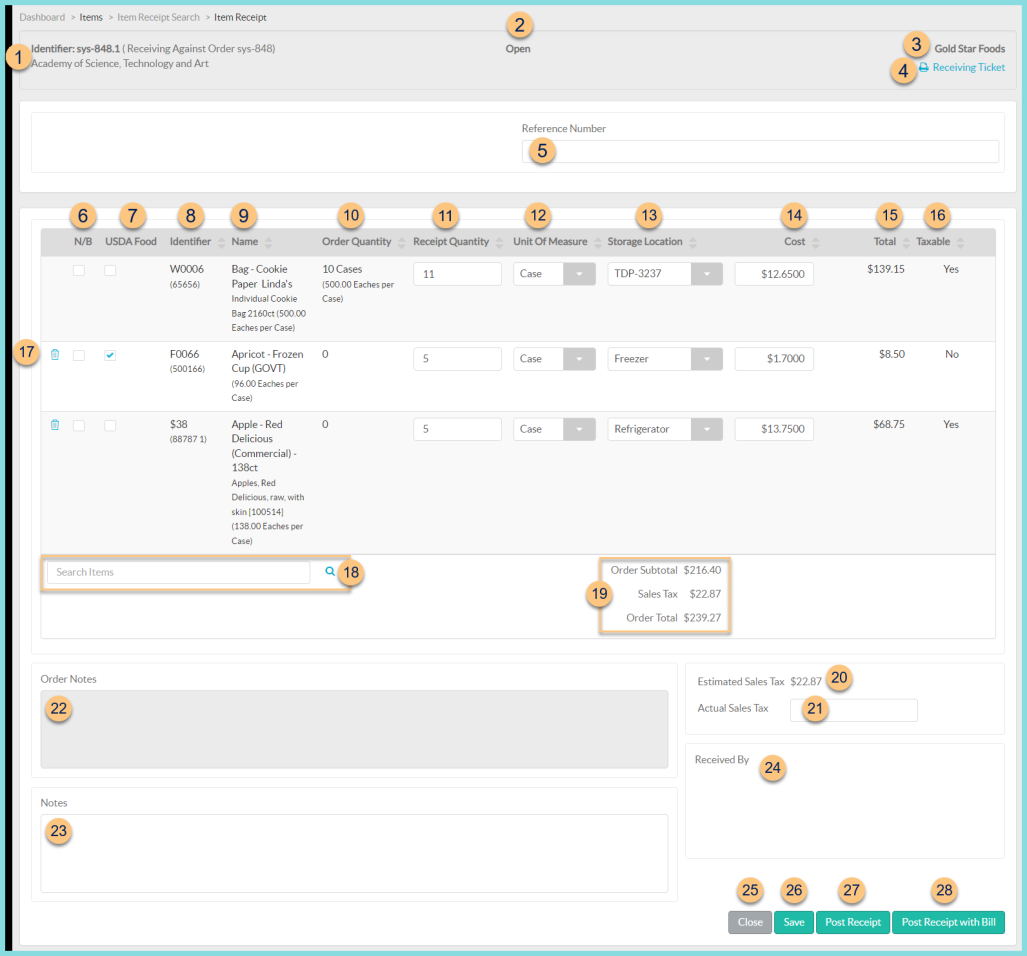
Notice the Identifier, Order Number, and Receiving Warehouse
-
Status - notice the order status
-
Vendor - notice the vendor
-
Print Receiving Ticket - click to request a Receiving Ticket report of this receipt
-
Reference Number (optional) - add a reference number for documentation purposes
Note: For districts with an active Tyler Financial System Integration, this field will read "Tyler Order Number," when there is a Tyler Order Number in the field.
-
N/B (vendor receipts only) - check to prevent this item from creating a backorder (aka No Backorder)
-
USDA Food (vendor receipts only) - check to indicate that this item is being received with USDA value
-
Identifier - click to sort by item identifier (vendor identifier)
-
Name - click to sort by item name
-
Order Quantity (vendor receipts only) or Fulfillment Quantity (not pictured, internal transfer receipts only) - click to sort by the quantity ordered or fulfilled and the number of base units of measure per preferred unit of measure
-
Receipt Quantity - click to sort by Receipt Quantity. Indicate the quantity received. This quantity is pre-populated with the requested quantity if not a manual receipt. Note: This field can be edited on warehouse receipts if the Adjust Quantity on Item Receipts from Warehouse Transfer Security right is enabled. Note: if the Receipt Quantity is greater than the Fulfillment Quantity or the Order Quantity, a Quantity Warning will appear. The receipt can still be posted with the quantity discrepancy.
-
Unit of Measure - click to sort by Unit of Measure. Select the unit of measure received.
-
Storage Location - Select the storage location for the item. Select sub-location if enabled. Note: A storage location must be selected for each item prior to posting.
Note: The storage location and sub-locations will be pre-populated with the location from the last receipt of the item if applicable. -
Cost (vendor receipts only) - Notice the cost or adjust the cost if the Adjust Item Receipt Prices Security right is enabled.
-
Total (vendor receipts only) - notice the Quantity x Cost
-
Taxable (vendor receipts only) - notice the taxable status
-
Trash Can - click to remove an item added in Step 18
-
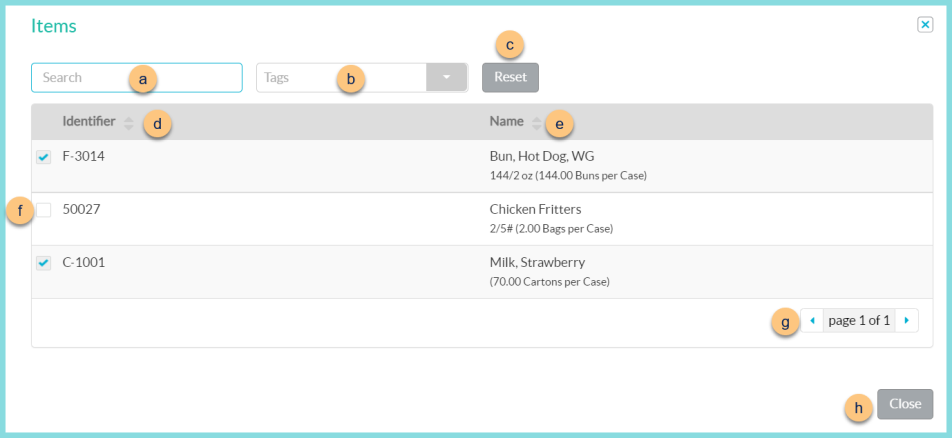
Search Items - search for items or click the Magnifying Glass to add items to the receipt (vendor receipts only)
-
Search - search for inventory items that are able to be sent to the receiving warehouse through the selected vendor
-
Tags - filter by item tags
-
Reset - click to reset filters
-
Identifier - click to sort by identifier
-
Name - click to sort by name
-
Checkbox - check to add item to receipt
-
< > - click to scroll through pages
-
Close - click to return to the receipt and add selected items
-
Order Total (vendor receipts only) - notice the order subtotal (sum of item costs), estimated sales tax or actual sales tax if entered, and order total including sales tax
-
Estimated Sales Tax = sum of (item cost of taxable items x sales tax rate of building)
-
Actual Sales Tax - enter the actual sales tax on the invoice from the vendor
Note: If no items on the receipt are taxable, this box will not be editable. -
Order Notes - view notes from order
-
Notes - enter notes as needed
-
Received By - notice the name and signature (if applicable) of the person who completed the Item Receipt. Note: this is only visible after posting the receipt.
-
Close - click to return to the previous screen
-
Save - click to save changes to the receipt without posting
-
Post - click to Post the receipt. This will remove product from the Inventory Route (warehouse receipts only) and add product to the receiving warehouse's inventory.
-
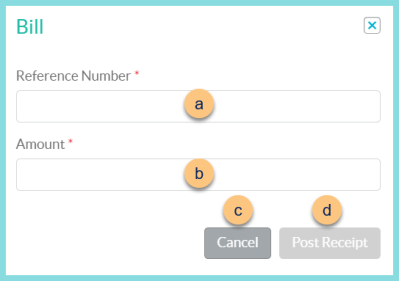
Post Receipt with Bill (available with Accounts Payable Only) - in addition to the Post function above, a vendor document will be created for payment.
-
Reference Number - enter reference number
-
Amount - enter amount from bill of lading
-
Cancel - click to return to the previous screen without posting the receipt or creating the vendor document
-
Post Receipt - click to post and create the vendor document